


![]()
Cabbage is a software for prototyping and developing audio plugins with the Csound audio synthesis language. It provides Csound programmers with a simple albeit powerful toolkit for the development of cross-platform audio software. Pre-built binaries for Microsoft Windows and Apple OSX(Built on OSX 10.6) are available from the Cabbage google code homepage.
This document will take you through the basics of using Cabbage. It starts with a look at features provided by the host and then moves on to some simple examples. The text concludes with a reference section for the various GUI controls available in Cabbage. It’s assumed that the reader has some prior knowledge of Csound.
In order to use Cabbage you MUST have Csound installed. Cabbage is only available for the doubles version of Csound. This is the version that comes with the various platform installers so there shouldn't be any problems. If however you build your own version of Csound don't forget to use the 'useDouble=1' option or Cabbage will not work properly.
The Cabbage standalone player

Most prototyping will be done in the Cabbage standalone host. This host lets you load and run Cabbage instruments, as seen in the screenshot above. Clicking on the options button will give you access to the following commands:
Open Cabbage Instrument
Use this command to open a cabbage instrument(Unified Csound file with a dedicated <Cabbage></Cabbage> section). You may open any .csd file you wish and add a Cabbage section yourself once it’s open. If opening existing Csound instrument you will need to use the-n command line options to tell Csound not to open any audio devices, as these are handled directly by Cabbage. On OSX users can open .csd files contained within plugins. Just select a .vst file instaed of a .csd file when opening. See the sections on exporting plugins for more information.
New Cabbage…
This command will help you create a new Cabbage instrument/effect. Cabbage instruments are synthesisers capable of creating sounds from scratch while effects process incoming audio. Effects can access the incoming audio by using the inch or ins opcodes. All effects have stereo inputs and stereo outputs. Instruments can access the incoming MIDI data in a host of different ways but the easiest is to pipe the MIDI data directly to instrument p-fields using the MIDI inter-op command line flags. Examples can be found in the examples folder.
View Source Editor
This command will launch the integrated text editor. The text editor will always contain the text which corresponds to the instrument that is currently open. Each time a file is saved in the editor(Ctrl+S), Cabbage will automatically recompile the underlying Csound instrument and update any changes that have been made to the instruments GUI. The editor also features a Csound message console that can prove useful when debugging instruments.
Audio Settings
Clicking on the audio settings command will open the audio settings window. Here you can choose your audio/MIDI input/output devices. You can also select the sampling rate and audio buffer sizes. Small buffer sizes will reduce latency but might cause some clicks in the audio. Keep testing buffer sizes until you find a setting that works best for your PC.
Cabbage hosts Csound instruments. It uses its own audio IO callbacks which will override any IO settings specified in the <CsOptions> sections of your Csound file.
Export…
This command will export your Cabbage instrument as a plugin. Clicking synth or plugin will cause Cabbage to create a plugin file(with a .dll file extension) into teh same directory as teh csd file you are using. When exporting as Cabbage will prompt you to save your plugin in a set location, under a specific name. Once Cabbage has created the plugin it will make a copy of the current .csd file and locate it in the same folder as the plugin. This new .csd file will have the same name as the plugin and should ALWAYS be in the same directory as the plugin.
You do not need to keep exporting instruments as plugins every time you modify them. You need only modify the associated source code. To simplify this task, Cabbage will automatically load the associated .csd file whenever you export as a plugin. On OSX Cabbage can open a plugin’s .csd file directly by selecting the plugin when prompted to select a file to open.
Always on Top
This command lets you toggle Always on top mode. By default it is turned on. This means your Cabbage instrument will always appear on top of any other applications that are currently open.
Update Instrument
This command updates Cabbage. This is useful if you decide to use another editor rather the one provided. Just remember to save any changes made to your Cabbage instrument before hitting update.
Auto-update
Checking this will cause Cabbage to continuously check whether changes have been made to the file it has open. If you wish to use a different source code editor with Cabbage than the one provided, you can check this option. Whenever you save changes to the .csd file that Cabbage currently has open, it will automatically update according to the changes made. Although it’s not as quick as the integrated editor, it does give you scope to use some feature rich source code editors with Cabbage.
Use Cabbage IO
This will turn on or off Cabbage audio and MIDI input/output and is only applicable to standalone instruments. When Cabbage IO is turned off Cabbage will let Csound take control of the audio and MIDI IO. This means that users will need to use standard Csound IO flags in the <CsOptions> section of their .csd file.
Batch Convert
This command will let you convert a selection of Cabbage .csd files into plugins so you don’t have to manually open and export each one.
This feature is currently only available on Windows.
Your first Cabbage instruments
The following section describes the steps involved in building a simple Cabbage instrument. It’s assumed that the user has some prior knowledge of Csound. When creating a Cabbage patch users must provide special xml-style tags at the top of a unified Csound file. The Cabbage specific code should be placed between an opening <Cabbage> and a closing </Cabbage> tag. You can create a new instrument by using the New Cabbage Instrument menu command. Select either a synth or an effect and Cabbage will automatically generate a basic template for you to work with.
Each line of Cabbage specific code relates to one graphical user interface(GUI) control only. Lines must start with the type of GUI control you wish to use, i.e, vslider, button, xypad, etc. Users then add identifiers to indicate how the control will look and behave. All parameters passed to identifiers are either strings denoted with double quotes or numerical values. Information on different identifiers and their parameters is given below in the reference section. Long lines can be broken up with a \ placed at the end of a line.
This section does not go into details about each Cabbage control, nor does it show all available identifiers. Details about the various Cabbage controls can be found in reference section below.
A basic Cabbage synthesiser
Code to create the most basic of Cabbage synthesisers is presented below. This instrument uses the MIDI interop command line flags to pipe MIDI data directly to p-fields in instrument 1. In this case all MIDI pitch data is sent directly to p4, and all MIDI amplitude data is sent to p5. MIDI data been sent on channel 1 will cause instrument 1 to play. Data being sent on channel 2 will cause instrument 2 to play. It has been reported that the massign opcode does not work as expected with Cabbage. This is currently under investigation.
<Cabbage>
form size(400, 120), caption("Simple Synth"), pluginID("plu1")
keyboard bounds(0, 0, 380, 100)
</Cabbage>
<CsoundSynthesizer>
<CsOptions>
-n -d -+rtmidi=NULL -M0 --midi-key-cps=4 --midi-velocity-amp=5
</CsOptions>
<CsInstruments>
sr = 44100
ksmps = 64
nchnls = 2
0dbfs=1

instr 1
kenv linenr p5, 0.1, .25, 0.01
a1 oscil kenv*k1, p4, 1
outs a1, a1
endin

</CsInstruments>
<CsScore>
f1 0 1024 10 1
f0 3600
</CsScore>

</CsoundSynthesizer>
You’ll notice that a -n and -d are passed to Csound in the CsOptions section. -n stops Csound from writing audio to disk. This must be used as Cabbage manages its own audio IO callbacks. The -d prevents any FLTK widgets from displaying. You will also notice that our instrument is stereo. ALL Cabbage instruments operate in stereo.
Controlling your Cabbage patch
The most obvious limitation to the above instrument is that users cannot interact directly with Csound. In order to do this one can use a Csound channel opcode and a Cabbage control such as a slider. Any control that is to interact with Csound must have a channel identifier.
When one supplies a channel name to the channel() identifier Csound will listen for data being sent on that channel through the use of the named channel opcodes. There are a few ways of retrieving data from the named channel bus in Csound, the most straightforward one being the chnget opcode. It’s defined in the Csound reference manual as:
kval chnget Sname
Sname is the name of the channel. This same name must be passed to the channel() identifier in the corresponding <Cabbage> section.
At present Cabbage only works with the chnget/chnset method of sending and receiving channel data. invalue and outvalue won't work.
Our previous example can be modified so that a slider now controls the volume of our oscillator.
<Cabbage>
form size(400, 170), caption("Simple Synth"), pluginID("plu1")
hslider  bounds(0, 110, 380, 50), channel("gain"), range(0, 1, .5), textBox(1)
keyboard bounds(0, 0, 380, 100)
</Cabbage>
<CsoundSynthesizer>
<CsOptions>
-n -d -+rtmidi=NULL -M0 --midi-key-cps=4 --midi-velocity-amp=5
</CsOptions>
<CsInstruments>
sr = 44100
ksmps = 64
nchnls = 2
0dbfs=1

instr 1
k1 chnget "gain"
kenv linenr p5, 0.1, 1, 0.1
a1 oscil kenv*k1, p4, 1
outs a1, a1
endin

</CsInstruments>
<CsScore>
f1 0 1024 10 1
f0 3600
</CsScore>
</CsoundSynthesizer>
In the example above we use a hslider control which is a horizontal slider. The bounds() identifier sets up the position and size of the widget. The most important identifier is channel("gain"). It is passed a string called gain. This is the same string we pass to chnget in our Csound code. When a user moves the slider, the current position of the slider is sent to Csound on a channel named "gain". Without the channel() identifier no communication would take place between the Cabbage control and Csound. The above example also uses a MIDI keyboard that can be used en lieu of a real MIDI keyboard when testing plugins.

A basic Cabbage effect
Cabbage effects are used to process incoming audio. To do so one must make sure they can access the incoming audio stream. Any of Csound's signal input opcodes can be used for this. The examples that come with Cabbage use both the ins and inch opcodes to retreive the incoming audio signal. The following code is for a simple reverb unit. It accepts a stereo input and outputs a stereo signal.
 <Cabbage>
form caption("Reverb") size(230, 130)
groupbox text("Stereo Reverb"), bounds(0, 0, 200, 100)
rslider channel("size"), bounds(10, 25, 70, 70), text("Size"), range(0, 2, 0.2)
rslider channel("fco"), bounds(70, 25, 70, 70), text("Cut-off"), range(0, 22000, 10000)
rslider channel("gain"), bounds(130, 25, 70, 70), text("Gain"), range(0, 1, 0.5)
</Cabbage>
<CsoundSynthesizer>
<CsOptions>
-d -n
</CsOptions>
<CsInstruments>
; Initialize the global variables.
sr = 44100
ksmps = 32
nchnls = 2

instr 1
kfdback chnget "size"
kfco chnget "fco"
kgain chnget "gain"
ainL inch 1
ainR inch 2
aoutL, aoutR reverbsc ainL, ainR, kfdback, kfco
outs aoutL*kgain, aoutR*kgain
endin

</CsInstruments>
<CsScore>
f1 0 4096 10 1
i1 0 1000
</CsScore>
</CsoundSynthesizer>
The above instrument uses 3 sliders to control
-
the reverb size
-
the cut-off frequency for the internal low-pass filters set up on the different delay lines
-
overall gain.
The range() identifier is used with each slider to specify the min, max and starting value of the sliders.

Exporting your instruments as plugins
Once you have created your instruments you will need to export them as plugins if you want them to be seen by other host applications. When you export in Cabbage it will create a plugin file that will have the same name as the csd file you are currently working on. In your plugin host you will need to add the directory that contains your Cabbage plugins and csd files.
In order to make future changes to the instrument you only need to edit the associated .csd file. For instance, if you have a plugin called "SavageCabbage.dll" and you wish to make some changes, you only have to edit the corresponding "SavageCabbage.csd" file. In order to see the changes in your plugin host you will need to delete and re-instantiate the plugin from the track. Your changes will be seen once you re-instantiate the plugin.
Cabbage Reference
Each and every Cabbage control has a numbers of possible identifiers that can be used to tell Cabbage how it will look and behave. Identifiers with parameters enclosed in quote marks must be passed a quoted string. Identifiers containing parameters without quotes must be passed numerical values. All parameters except pos() have default values and are therefore optional. In the reference tables below any identifiers enclosed in square brackets are optional.
As pos() and size() are used so often they can be set in one go using the bounds() identifier:
bounds(x, y, width, height): bounds takes integer values that set position and size on screen(in pixels)
Below is a list of the different GUI controls currently available in Cabbage. Controls can be split into two groups, interactive controls and non-interactive controls. The non-interactive controls such as group boxes and images don’t interact in any way with either Csound or plugin hosts. The interactive controls such as sliders and buttons do interact with Csound. Each interactive control that one inserts into a Cabbage instrument will be accessible in a plugin host if the instrument has been exported as a plugin. The name that appears beside each native slider in the plugin host will be the assigned channel name for that control.
In order to save space in the following reference section bounds() will be used instead of pos() and size() wherever applicable.
Form
form caption("title"), size(Width, Height), pluginID("plug")
Form creates the main application window. pluginID() is the only required identifier. The default values for size are 600x300.
caption: The string passed to caption will be the string that appears on the main application window.
size(Width, Height): integer values denoted the width and height of the form.
pluginID("plug"): this unique string must be four characters long. It is the ID given to your plugin when loaded by plugin hosts.
Every plugin must have a unique pluginID. If two plugins share the same ID there will be conflicts when trying to load them into a plugin host.
Example:
form caption("Simple Synth"), pluginID("plu1")
GroupBox
groupbox bounds(x, y, width, height), text("Caption")
Groupbox creates a container for other GUI controls. They do not communicate with Csound but can be useful for organising widgets into panels.
bounds(x, y, width, height): integer values that set position and size on screen(in pixels)
text("caption"): "caption" will be the string to appear on the group box
Example:
groupbox bounds(0, 0, 200, 100), text("Group box")

Keyboard
keyboard bounds(x, y, width, height)
Keyboard create a piano keyboard that will send MIDI information to your Csound instrument. This component can be used together with a hardware controller. Pressing keys on the actual MIDI keyboard will cause the on-screen keys to light up.
bounds(x, y, width, height): integer values that set position and size on screen(in pixels)
Example:
keyboard bounds(0, 0, 200, 100)

CsoundOutput
csoundoutput bounds(x, y, width, height), text("name")
csoundoutput will let you view the Csound output console within your instrument’s GUI, useful when 'de-slugging'(debugging in Cabbage is known as de-slugging!) Cabbage instruments.
bounds(x, y, width, height): integer values that set position and size on screen(in pixels)
text("name"): "name" will be the text that appears on the top of the check box.
Example:
csoundoutput bounds(210, 00, 340, 145), text("Csound Output")

Image
image bounds(x, y, width, height), file("file name"), shape("type"), colour("colour")\ outline("colour"), line(thickness)
Image creates a static shape or graphic. It can be used to show pictures or it can be used to draw simple shapes. If you wish to display a picture you must pass the file name to the file() identifier. The file MUST be in the same directory as your Cabbage instrument. If you simply wish to draw a shape you can choose a background colour with colour() and an outline colour with outline(). line() will let you determine the thickness of the outline.
bounds(x, y, width, height): integer values that set position and size on screen(in pixels)
file("filename"): "filename" is the name of the image to be displayed on the control
shape("type");: "shape" must be either "round"(with rounded corners, default), "sharp"(with sharp corners), or "ellipse"(an elliptical shape)
colour("colour"): This sets the colour of the image if no file name is given with the file identifier. Any CSS or HTML colour string can be passed to this identifier.
outline("colour"): This sets the outline colour of the image/shape. Any CSS or HTML colour string can be passed to this identifier.
line(thickness): This sets the line thickness in pixels.
Example:
image bounds(0, 10, 260, 190), colour("white") image bounds(5, 15, 250, 180),\
colour("brown") image bounds(30, 30, 200, 150), \                                      file("logo_cabbage_sw_no_text.png")

Sliders
hslider bounds(x, y, width, height), channel("chanName")[, caption("caption"), \
text("name"), textBox(on/off), range(min, max, value, skew, incr), \
midCtrl(Channel, Ctrlnum), colour("colour")]
Slider can be used to create an on-screen slider. Data can be sent to Csound on the channel specified through the chanName string. Presented above is the syntax for a horizontal slider, i.e., hslider. In order to change it to another slider type simple substitute hslider with the appropriate identifier as outlined below.
bounds(x, y, width, height): integer values that set position and size on screen(in pixels)
channel("chanName"): "chanName" is the name of the channel upon which to communicate with Csound(see examples above).
caption("caption"): This identifier lets you place your control within a groupbox. "caption" is the text that will appear on groupbox. This identifier is useful for naming and containing controls.
range(min, max, value, skew, incr): the first 2 parameters are required. The rest are optional. The first two parameters let you set the minimum value and the maximum value. The next parameter determines the initial value of the slider. The next allows you to adjust the skew factor. Tweaking the skew factor can cause the slider to output values in a non linear fashion. A skew of 0.5 will cause the slider to output values in an exponential fashion. A skew of 1 is the default value, which causes the slider to behave is a typical linear form.
For the moment min must be less than max. In other words you can’t invert the slider. Also note that skew defaults to 1 when the slider is being controlled by MIDI.
text("name"): The string passed in for "name" will appear on a label beside the slider. This is useful for naming sliders.
textBox(on/off): textbox takes a 0 or a 1. 1 will cause a text box to appear with the sliders values. Leaving this out will result in the numbers appearing automatically when you hover over the sliders with your mouse.
midCtrl(channel, Ctrlnum) : channel must be a valid midi channel, while controller num should be the number of the controller you wish to use. This identifier only works when running your instruments within the Cabbage standalone player.
colour("colour"): This sets the colour of the image if a file name is not passed to file. Any CSS or HTML colour string can be passed to this identifier.
Slider types:
hslider: horizontal slider
vslider: vertical slider
rslider: rotary slider
Example:
rslider bounds(0, 110, 90, 90), caption("Freq1"), channel("freq2"), \
colour("cornflowerblue"), range(0, 1, .5), midictrl(0, 1)
rslider bounds(100, 120, 70, 70), text("Freq2"), channel("freq2"), \
colour("red"), range(0, 1, .5), midictrl(0, 1) rslider bounds(190, 120, 70, 70), \ text("Freq3"), channel("freq2"), colour("green"), text("Freq3"), textbox(1)

Button
button bounds(x, y, width, height), channel("chanName")[,text("offCaption","onCaption")\ caption("caption"), value(val)]
Button creates a button that can be used for a whole range of different tasks. The "channel" string identifies the channel on which the host will communicate with Csound. "OnCaption" and "OffCaption" determine the strings that will appear on the button as users toggle between two states, i.e., 0 or 1. By default these captions are set to "On" and "Off" but the user can specify any strings they wish. Button will constantly toggle between 0 and 1.
bounds(x, y, width, height): integer values that set position and size on screen(in pixels)
channel("chanName"): "chanName" is the name of the channel upon which to communicate with Csound(see examples above).
caption("caption"): This identifier lets you place your control within a groupbox. "caption" is the text that will appear on group box. This identifier is useful for naming and containing controls.
text("offCaption", "onCaption"): The text identifier must be passed at least one string argument. This string will be the one that will appear on the button. If you pass two strings to text() the button will toggle between the two string each time it is pushed.
value(val): val sets the initial state of the control
Example:
button  bounds(0, 110, 120, 70), caption("Freq1"), text("On", "Off"), channel("freq2"),\ value(1)
button bounds(150, 110, 120, 70), text("On", "Off"), channel("freq2"), value(0)

CheckBox
checkbox bounds(x, y, width, height), channel("chanName")[, text("name"), value(val), caption("Caption")]
Checkbox creates a checkbox which functions like a button only the associated caption will not change when the user checks it. As with all controls capable of sending data to an instance of Csound the channel string is the channel on which the control will communicate with Csound.
channel("chanName"): "chanName" is the name of the channel upon which to communicate with Csound(see examples above).
caption("caption"): This identifier lets you place your control within a groupbox. "caption" is the text that will appear on groupbox. This identifier is useful for naming and containing controls.
text("name"): "name" will be the text that appears beside the checkbox.
value(val): val sets the initial state of the control
Example:
checkbox bounds(0, 110, 120, 70), caption("Freq1"), text("On"), channel("freq2")
checkbox bounds(130, 110, 120, 70), text("Mute"), channel("freq2"), value(1)

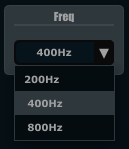
ComboBox
combobox bounds(x, y, width, height), channel("chanName")[, value(val), items("item1",\ "item2", ...), caption("caption")]
Combobox creates a drop-down list of items which users can choose from. Once the user selects an item, the index of their selection will be sent to Csound on a channel named by the channel string. The default value is 0.
bounds(x, y, width, height): integer values that set position and size on screen(in pixels)
channel("chanName"): "chanName" is the name of the channel upon which to communicate with Csound(see examples above).
items("item1", "item2", etc): list of items that will populate the combobox. Each item has a corresponding index value. The first item when selected will send a 1, the second item a 2, the third a 3 etc.
value(val): val sets the initial state of the control
caption("caption"): This identifier lets you place your control within a groupbox. "caption" is the text that will appear on groupbox. This identifier is useful for naming and containing controls.
Example:
combobox bounds(0, 110, 120, 70), channel"freq"), caption("Freq"), items("200Hz", "400Hz", "800Hz"), value(2)
XYPad
xypad bounds(x, y, width, height), channel("chanName")[, rangex(min, max, val)\ rangey(min, max, val), text("name")]
xypad is an x/y controller that sends data to Csound on two named channels. The first channel transmits the current position of the ball on the X axis, while the second transmits the position of the ball on the Y axis. If you turn on automation via the checkbox located on the bottom left of the xypad you can throw the ball from edge to edge. Once the ball is in full flight you can control the speed of the ball using the XYpad slider.
bounds(x, y, width, height): integer values that set position and size on screen(in pixels)
channel("chanName"): "chanName" is the name of the channel in which to communicate with Csound(see examples above).
text("name"): "name" will be the text that appears on the top right hand side of the XYpad surface.
rangex(min, max, value): sets the range of the X axis. The first 2 parameters are required. The third is optional. The first two parameters let you set the minimum value and the maximum value. The next parameter determines the initial value.
rangey(min, max, value): sets the range of the Y axis. The first 2 parameters are required. The third is optional. The first two parameters let you set the minimum value and the maximum value. The next parameter determines the initial value.
Example:
xypad bounds(0, 0, 300, 300), text("X/Y PAD"), rangex(0, 500, 250), rangey(0, 100, 25)

Quick Reference
The table below lists all the various Cabbage controls that are currently available.
|
Available GUI Controls |
Description |
|
form |
Main window. |
|
groupbox |
A container for placing control on. |
|
image |
Used to display an image from file. |
|
keyboard |
MIDI keyboard. |
|
label |
Used to display text. |
|
csoundoutput |
Will show a window with the output from Csound in it. |
|
snapshot |
Can be used to record presets. |
|
infobutton |
When pressed will display a web browser with a user defined file. Can be useful for displaying plugin help in HTML. (Only available on OSX and Windows) |
|
line |
Used to display a line. Useful when designing GUIs. |
|
table |
For displaying Csound function tables. Tables are notified to update from Csound. |
|
rslider, hslider, vslider |
Rotary, Horizontal and Vertical sliders. Range can be set, along with an increment value. A skew factor can be set in order for it to behave non-linearly. |
|
button |
Button. Toggles between 1 and 0 when clicked. |
|
combobox |
Pressing a combo box causes an indexed drop-down list to appear. The item index is sent to Csound. |
|
checkbox |
A toggle/check box. Will show when it's on and off. Sends a 0 or 1 to Csound. |
|
xypad |
A xyPad which can be used to controls two parameters at the same time. Animation can also be enabled to throw the ball around. It's also possible to draw a path for the ball. |
The next table contains all the available identifiers for Cabbage widgets. Note that not all controls support the same identifiers. For example, a groupbox will never need to have a channel assigned to it because it's a static control. Likewise buttons don't need to use the range() identifier as they always toggle between 0 and 1. Parameters within quotation marks represent string values, while those without represent floating point decimals, or integer values.
|
GUI Control |
Supported identifiers |
|
pos(x, y) |
Sets the position of the control within it's parent. |
|
size(width, height) |
Sets the size of the control. |
|
bounds(x, y, width, height) |
Sets a controls position on screen and size. |
|
channel(“channel”) |
Sets up a software channel for Csound and Cabbage to communicate over. Channels should only contain valid ascii characters. |
|
caption(“caption”) |
Used to set the name of the instrument and also used to automatically place a control within a group box. |
|
min(min) |
Set minimum value for a slider. |
|
max(max) |
Set maximum value for a slider. |
|
value(val) |
Set initial value for sliders, combo boxes, check boxes and buttons. When used with a keyboard controls it can be used to set the lowest note seen on screen. |
|
range(min, max, val, skew, incr) |
Sets range of slider with and initialises it to val. Users can get the slider to a have in a non-linear fashion by selecting a skew value less than 1, while incr can be used to control how big each step is when the slider is moved. |
|
rangex(min, max, val) rangey(min, max, val) |
Set the ranges of the xyPad's X and Y axis. |
|
colour(“colour”) colour(red, green, blue, alpha) |
Sets the colour of the control. Any CSS or HTML colour string can be passed to this identifier. The colour identifier can also be passed an RBG, or RGBA value. All channel values must be between 0 and 255. For instance colour(0, 0, 255) will create blue, while colour(0, 255, 0, 255) will create green with an alpha channel set to full. |
|
fontcolour(“colour”) fontcolour(red, green, blue, alpha) |
Sets the colour of the font. Please see the colour identifier for details on the parameters. |
|
tracker(“colour”) |
Set the colour of a sliders tracker. See the colour identifier for details on the parameters. |
|
outline(“colour”) |
Set the outline colour of an image. See the colour identifier for details on the parameters. |
|
textbox(val) |
Used with slider to turn on or off the default textbox that appears beside them. By default this is set to 1 for on, if you pass a 0 to it, the textbox will no longer be displayed. |
|
text(“string”) |
Used to set the text on any components that displays text. |
|
file(“filename”) |
Used to select the file that is to be displayed with the image control. |
|
populate(“file type”, “dir”) |
Used to add all files of a set type, located in specific directory to a combo boxes list of items. |
|
author(“author's name”) |
Used to add the author's name, or any other message to the bottom of the instrument. |
|
items(“one”, “two”, “three”, …) items(“on”, “off”) |
Used to populate buttons, combo boxes and snapshots. When used with a button the first two parameters represent the captions the button will display when clicked. When used with a snapshot each item represents a saved preset. |
|
preset(“preset”) |
Used to tie a snapshot control to a particular control |
|
plant(“name”) |
Used to turn an image or group box into a container for controls. Each plant must be given a unique name and must be followed by a pair of curly brackets. Any widget declared within these bracket swill belong to the plant. Coordinates for children are relative to the top left position of its parent control. Resizing the parent will automatically cause all children to resize accordingly. |
|
shape(“shape”) |
Used to set the shape of an image, can be set to rounded, ellipse or sharp for rectangles and squares. |
|
pluginID(“plug”) |
Used to set the plugin identifier. Each plugin should have a unique identifier, otherwise hosts may not be able to load them correctly. |
|
tablenumbers(1, 2, 3, 4, ...) |
Tells table controls which function tables to load. If more than one table is passed function table will be stocked on top of each other with an layer of transparency. |
|
midictrl(channel, controller) |
Can be used with sliders and button to enable the use of a MIDI hardware controller. Channel and controller set the channel and controller numbers. |
|
line(val) |
This identifier will stop the group box line from appearing if passed a 0. |
Troubleshooting, FAQs, tips and tricks
-
Why doesn’t my VST host see my Cabbage plugins? The most likely reason is that you have not added the directory containing your plugins to your host’s preferences. Most hosts will allow you to choose the folders that contain plugins. If you don’t set the Cabbage plugin directory then the host has no idea where your Cabbage plugins are located.
-
Why doesn’t my Cabbage plugin load? The most likely reason a plugin will not load is because there are errors in the Csound code. Cabbage plugins will load regardless of errors in the Cabbage code, but errors in the Csound code will stop Csound from compiling successfully and prevent the plugin from loading. Always make sure that the Csound code is error free before exporting.
-
One mega plugin or several smaller ones? It’s a good idea to split multi-effects instruments into separate plugins. This allows greater modularity within you plugin host and can often lead to less demand on your PC’s CPU.
-
Mixing effects and instruments? Adding an effect processor to a plugin instrument might seem like a good idea. For instance you might add some reverb to the output of your FM synth to create some nice presence. In general however it is best to keep them separate. Plugin instruments demand a whole lot more CPU than their effects siblings. Performance will be a lot smoother if you split the two processes up and simply send the output of your synthesiser into an instance of a Cabbage reverb effect plugin.
-
What’s up? My plugin makes a load of noise? If you have nchnls set to 1 there will be noise sent to the second, or right channel. Make sure that nchnls is ALWAYS set to 2! Also be careful when dealing with stereo input. If you try to access the incoming signal on the right channel but you don't have any audio going to the right channel you may experience some noise.
-
I can’t tell whether my sliders are controlling anything?! There will be times when moving sliders or other interactive controls just doesn’t do what you might expect. The best way to de-slug Cabbage instruments is to use the printk2 opcode in Csound. For instance if a slider is not behaving as expected make sure that Csound is receiving data from the slider on the correct channel. Using the code below should print the values of the slider to the Csound output console each time you move it. If not, then you most likely have the wrong channel name set.
(...) k1 chnget "slider1" printk2 k1 (...)
-
What gives? I’ve checked my channels and they are consistent, yet moving my sliders does nothing? Believe it or not I have come across some cases of this happening! In all cases it was due to the fact that the chosen channel name contained a /. Please try to use plain old letters for your channel names. Avoid using any kind of mathematical operators or fancy symbols and everything should be Ok.
-
Can I use nchnls to determine the number of output channels in my plugin? Currently all Cabbage plugins are stereo by default, but Cabbage can be built for any number of channels.
-
Can I use Csound MACROs in the <Cabbage> section of my csd file? I’m afraid not. The Cabbage section of your csd file is parsed by Cabbage’s own parser therefore it will not understand any Csound syntax whatsoever.
-
I’ve built some amazing instruments, how do I share them with the world?! Easy. Upload them to the Cabbage recipes section of Cabbage forum, available through http://www.thecabbagefoundation.org